About Calista Michel

Calista Michel is an editor and writer. She has been trying to start a blog for years about literature and poetry, but has discovered that her love of baking takes precedence. Baking kept her sane through her undergrad at the University of Toronto, and will doubtless get her through graduate school. She lives in downtown Toronto with her boyfriend and her cat.

Devil’s Food Chocolate Cake

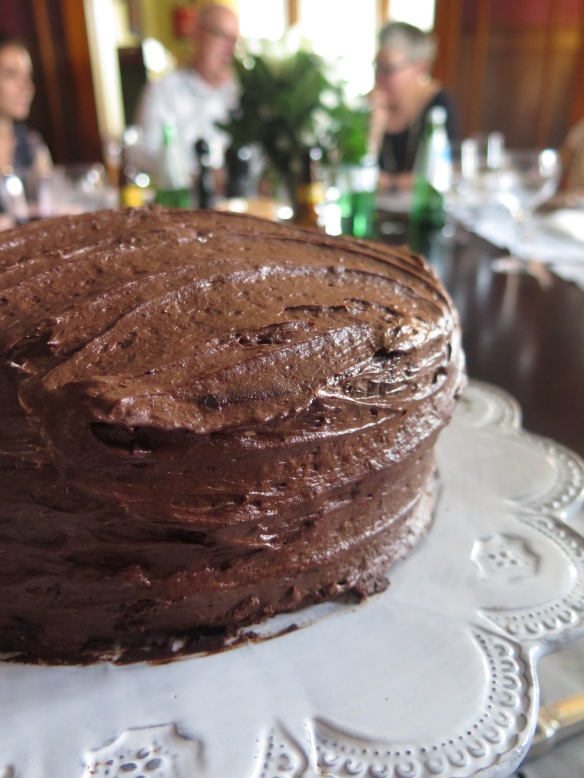
IMG_2927I’ve been telling myself to post this cake recipe on my blog. My partner and i discovered it while i was going through one of my bakeathon phases. I was a little less employed than i wanted to be, and i used my time to bake. I came upon this recipe for a Devil’s Food Chocolate Cake purely by happenstance and it remains one of my favourites to this day.

The recipe is from the New York Times Cooking website (which I must admit, I frequent… uh… frequently). What drew me to it was the vanilla bean and black pepper buttercream in between the cake layers. I love spicy chocolate anything, and the thought of sprinkling black pepper on my chocolate cake was irresistible.  My brother and his girlfriend seemed to enjoy it too.

Cake

Ingredients:

  • 10 tablespoons/140 grams unsalted butter, softened, more for greasing pans
  • cup/70 grams unsweetened cocoa powder
  • ¾ cup/180 milliliters whole milk
  • 2 cups/200 grams cake flour
  • 1 ½ teaspoons/10 grams baking soda
  • ½ teaspoon/3 grams baking powder
  • ½ teaspoon/3 grams kosher salt, more as needed
  • 1 ¾ cups/350 grams granulated sugar
  • 3 large eggs
  • 2 teaspoons/10 milliliters vanilla extract

Grease and line three 9-inch cake pans with butter and parchment. The parchment is essential if you want a whole cake layer to come out of the pans. I found this out the hard way and had to make my wedding cake twice. The night before the wedding. Use parchment.

In a small bowl, whisk together the cocoa powder and 2/3 cup boiling water. Add the milk. In a separate bowl, whisk together the flour, baking soda, baking powder, and salt. Set aside.

In a mixer fitted with the paddle attachment, beat the butter and sugar until light and fluffy. This is what will give your cake volume. Beat in the eggs, one at a time, until well incorporated. Then add the vanilla.

With the mixer on low speed, mix in a third of the dry ingredients. Follow that by half of the cocoa and water mix. Alternate between the dry and wet ingredients until the batter is fully mixed and there are no flour lumps visible. Divide it evenly among the pans.

Bake the cake at 350 F for 30–40 minutes, or until a tester comes out clean. Cool the cakes in the pans for ten minutes and then let them cool on the racks. While they are cooling, make the buttercream.

Swiss Buttercream

  • 6 fresh egg whites (must be fresh)
  • 1 cup granulated sugar
  • 1 pinch salt
  • 1 pound unsalted butter, room temperature
  • 1 tsp vanilla bean paste
  • 1 tsp freshly ground black pepper
  • 8 oz unsweetened chocolate, melted (for later)

Swiss buttercream is finnicky. I have watched countless batches and dozens of eggs go into the compost because it was too hot or too cold or some unknown, diabolical reason. I also had to make the buttercream twice for this cake (and nearly lost the second batch!) leading me to find the most foolproof way of making it that I could. The following is the only version of this recipe that I can seem to make work on a regular basis, and I would advise you to follow it exactly.

Mix together the egg whites, sugar, and salt in a metal bowl or double boiler. Over medium-high heat, whisk the egg whites constantly (so that they don’t cook) until the mixture no longer feels grainy to the touch. Remove them from the heat and place them into a stand mixer fitted with the whisk attachment.

On medium-high speed, beat the egg white mixture until it is room temperature and very, very thick. This can take upwards of 5 minutes. Make sure it really does reach room temperature, otherwise you risk curdling it.

While the eggs are being beaten, chop up the butter into little bits. Remove the whisk attachment and replace it with the paddle attachment. On low speed, add the butter every 6 seconds until it is all gone. Then let the mixer continue to work until the butter and the egg whites form one beautiful batch of swiss buttercream. Add the vanilla bean paste and the pepper and mix until just incorporated.

At this point, the chocolate is not yet needed. Spread the buttercream in between the layers of the cake and put it in the fridge to cool. With the remaining icing, fold in the melted chocolate until it is smooth and shiny. You might be able to use the mixer for this, but I did it by hand to make sure the buttercream didn’t curdle. Once the cake is cool, spread the chocolate icing on top and around, covering it completely. The cake keeps well in the fridge for up to 3 days.

IMG_2966

Chocolate Mousse Cake

DSC_1217

This past weekend, I made a birthday cake for one of my friends; and, since I know she loves chocolate mousse cake, I decided to try my hand at one again. (Last time I tried to make a mousse cake I followed the third recipe I found. It was a complete disaster.)

In an effort to avoid the same disaster as last year, I spent nearly a day looking for a satisfactory chocolate mousse cake. I’ve made chocolate mousse, and I’ve made cake, but finding a perfect blend of rich, moist cake topped with silky smooth mousse is impossible.

So I decided to create my own. This time, it was a success.

Cake

Ingredients:

  • 1 ½ cups all-purpose flour
  • 4 eggs
  • 1 cup granulated sugar
  • 1 cup unsalted butter, softened
  • 1 cup chocolate, chopped (or semi-sweet chocolate chips)
  • 1 cup sour cream
  • ½ tsp salt
  • 1 tsp baking powder
  • 1 tsp baking soda
  • 2 tsp vanilla extract

Melt chocolate over a double boiler. Personally, I don’t have one—instead I use a medium-large metal bowl over a saucepan. Melting the chocolate properly can be a bit tricky. I set the heat quite low (you want the water to be simmering, but not boiling). Be careful not to get steam into the chocolate, otherwise it will be ruined. Oh, and wear heat protection. The bowl gets quite hot!

Once you have the chocolate melted, cream the butter and sugar in a large bowl. Add eggs one at a time, then add vanilla and salt. Mix together flour, baking powder, and baking soda. Pour the dry mixture into the wet mixture—you can use a sieve. Slowly incorporate the ingredients until they are well mixed. Add the melted chocolate and sour cream. Put into a prepared 12-inch springform pan and bake at 350F for 50-70 minutes or until a toothpick inserted into the middle of the cake comes out clean. Let cool completely before topping with mousse.

Mousse

Ingredients:

  • 6 oz chocolate (I like to use 70–85%)
  • 3 cups heavy cream
  • 6 oz unsalted butter
  • Icing sugar for dusting (optional)

Melt chocolate in a double boiler the same way you did for the cake. Add butter and stir until well combined. Set aside to cool. Beat cream until fluffy. Fold half of cream mixture into chocolate, then add chocolate to rest of cream. Fold until combined with no evidence of streaking. Pour on top of the cake in the springform pan and cover with plastic wrap. Let the mousse set in the fridge overnight. Top with icing sugar and enjoy!

Pancakes!

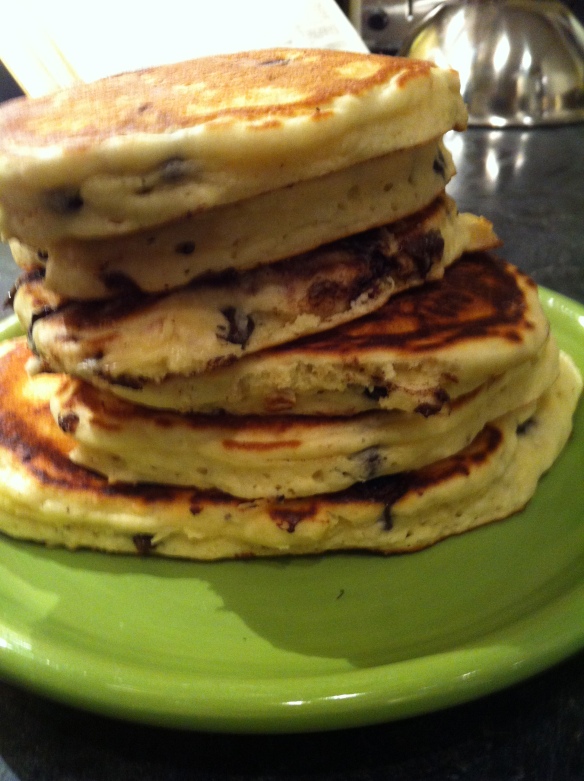
image

When my parents moved into the house they are in now, there was an old recipe book hidden in the cupboards that had been unceremoniously left behind. I love old things, thus I decided to take a look and try some of the recipes.

Many of the recipes were economical ways to throw dinner parties during the 1920s and 1930s. There was even a little price guide stuck between the front cover and the table of contents. 15-year-old me was in heaven.

The best recipe in this book, as I’m sure you can guess, was the pancake recipe. I can’t tell you how many times my brother and I would spend our Saturday mornings drinking coffee and flipping pancakes on the griddle. Sometimes we even put chocolate chips inside. Yum!

Pancakes

Ingredients:

  • 1 cup all-purpose flour
  • 1 cup milk
  • 2 tbsp butter
  • 1 egg
  • 2 tsp baking powder
  • 2 tbsp sugar
  • 1/2 tsp salt

In a non-metal bowl, microwave the butter until fully melted. Mix flour, baking powder, sugar, and salt in a large bowl. In a smaller bowl, whisk together the milk, the butter, and the egg.

Pour wet ingredients into the dry ingredients and mix well until no lumps remain. I usually stir a little bit of the wet in at a time until fully combined.

Heat a pan or griddle to medium-high heat and melt butter on it if needed. Cook pancake batter until the top is covered in little holes, then flip. Make sure the pancakes do not burn.

*I usually need to turn the heat on my griddle down as I progress through the batter, otherwise the pancakes burn while leaving large parts of the middle uncooked. Personally, I like my pancakes to be cooked all the way through.

Jamaican Beef Patties

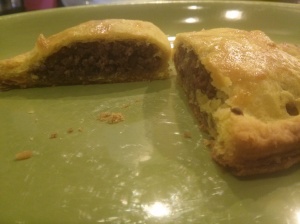
2014-02-10 14.25.40

When my brother and I were little, our mum would buy those pre-cooked, pre-packaged beef patties that you stuck in the microwave. They always burned my mouth. But I’ve always loved them. There is something so intoxicating about pastry and beef and spices.

I found a recipe for beef patties on a site that has now been taken down. Luckily I saved the recipe, because my brother and I made up a batch of patties last weekend. We had a production line going: he would roll out the pastry, I would fill it and pinch the edges together. We churned out almost three dozen.

This version of Jamaican beef patties is much more substantial than the pre-packaged ones you find in the store. The beef paste isn’t paste, and the pastry crumbles in your mouth in delicious, buttery goodness. If you want to make the beef stretch further, you could try putting mashed potatoes and/or peas into the beef mixture. I’ve always wanted to try that, despite compromising the purity of the patty. 😉

Filling

  • 3 tablespoons butter
  • 1 small onion, finely chopped
  • 2 lb lean lean ground beef, lamb, or goat
  • 1 1/2 tsp allspice
  • 1 1/2 tsp curry powder
  • 1 teaspoon dried thyme
  • 1/2–1 cup dry breadcrumbs
  • 1–5 green or red chili peppers (optional)

In a large skillet, melt the butter. Add the onions and sauté until the onion is translucent. Add the ground beef, lamb, or goat and sauté until the meat is well browned and very finely minced (you will need to stir constantly to get the right texture—I use a potato masher to mince the meat finely). Add the spices and breadcrumbs and stir until the mixture coats the meat entirely. Let mixture cool COMPLETELY before using.

Make pastry.

Pastry

  • 2 1/2 cups pastry flour
  • 1 teaspoon salt
  • 1 tsp turmeric
  • 1 cup butter , ice cold, cut into small (1/4 inch) cubes
  • 1/2 cup ice cold water

Divide dough into 10 equal portions. Roll each portion out on lightly floured surface to about 6 inches in diameter and 1/8 inch thick.

Once cooled, roll out all circles. Working quickly, fill one half of all ten pastries with 4oz of meat filling. Brush the edges with beaten egg or water and fold over on the filled half. Transfer to a baking sheet with a large spatula, and using a floured fork, crimp the edges of the pastry. Brush pastries with remaining egg. Bake at 400 degrees F for 30 minutes.

Allow to cool for 5-8 minutes before serving.

2014-02-10 14.26.262014-02-10 14.26.45

Sexy Spicy Chocolate Cookies

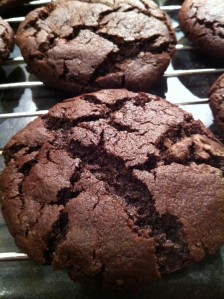
cropped-2012-11-30-12-37-31.jpg

There is nothing sexier than the heady mixture of rich chocolate and cayenne pepper. I remember a scene in Chocolat where Juliette Binoche adds cayenne pepper to her hot chocolate. Ever since then, I have done the same with my hot chocolate. So when I discovered these cookies, I just about died in ecstasy.

These cookies are perfectly crunchy on the outside, and soft, melt-in-your-mouth chewy on the inside. The best part? They’re vegan! (My boyfriend refused to believe that they were vegan until I showed him the recipe. Score!)

Cookies

Ingredients:

  • 1/2 cup olive oil
  • 3/4 cup sugar
  • 1/4 cup pure maple syrup
  • 3 tablespoons almond milk
  • 2 teaspoons vanilla extract
  • 1 1/3 cup all-purpose flour
  • 1/2 cup unsweetened cocoa powder
  • 1 teaspoon baking soda
  • 1/4 teaspoon salt
  • 1/2 teaspoon cinnamon
  • 1/2 teaspoon cayenne pepper

Preheat oven to 350 degrees F. Line two large baking sheets with parchment paper.

In a medium-sized mixing bowl, use a fork to vigorously mix together the oil and sugar.  Let stand a few minutes before whisking in the syrup, milk, and vanilla extract.

Sift in the remaining ingredients, stirring as you add them. Once all ingredients are added, mix until you’ve got pliable dough.

Roll the dough into walnut-sized balls. Transfer the dough balls to a baking sheet at least 2 inches apart (they do spread). Bake for 10-12 minutes; they should be a bit spread and crackly on top. Remove the cookies from the oven, let them cool 5 minutes, and then transfer them to wire racks to cool completely. And let the addiction begin.

Cinnamon Pastry Puffs

I may have nearly set the house on fire last night. Oops. (Sorry, Mum.)

But it was all worth it for these little beauties.

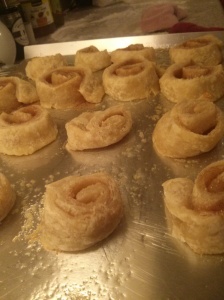
2014-02-12 22.48.21

I’ve found a few recipes for cinnamon pastry puffs, but none of them seem to work out in my favour. Either my kitchen becomes consumed by a blanket of smoke (like last night), or the pastry ends up soggy and undercooked. Nothing is worse than pastry that is undercooked. Or, you know, a burned-out shell of a house….

The trick to perfection in this case is setting the oven to a high temperature. I started at 425 degrees F, but should have started at 475. They also work really well (and I might say, better) in muffin tins. That way, the butter won’t seep onto the bottom of the oven and lead to the panicked waving of arms trying to get the smoke out (which almost never works, by the way).

Pastry

Ingredients:

  • 2 1/2 cups flour
  • 1 tbsp sugar
  • 1 tsp salt
  • 1 cup butter, chilled
  • 1/2–1 cup cold water

Mix flour, sugar, salt, and butter together until well combined. Some large chunks of butter are OK. Add the water 1 tbsp at a time until pastry holds together but is not sticky. Chill for half an hour before rolling.

Cinnamon Pastry Puffs

Ingredients:

  • Pastry (see above)
  • 2 tbsp melted butter, unsalted
  • 2 tsp cinnamon
  • 2–4 tbsp sugar, depending on preference

Dust a clean surface with flour. Place pastry in the middle and also dust with flour. Roll out to 1/4 of an inch thick in roughly a rectangular shape. You can always trim uneven bits if you like.

2014-02-12 22.07.06

Once pastry is rolled, brush the melted butter to the edge, making sure everything is covered. Dust with cinnamon and sugar (I like to mix them together first) and roll.

2014-02-12 22.12.03

Use a knife to cut the roll into 1-inch slices, place on a baking sheet (or muffin tin) and bake at 475 degrees F for 10–15 minutes or until pastry is golden brown.

2014-02-12 22.18.26

Let cool 5–10 minutes before serving.

2014-02-12 22.48.08

Tourtière

2012-12-21 19.56.31

I recently spent a week with my grandmother.

She is old. She wobbles when she walks. And her hands are losing strength more quickly than she would like. Consequently, she ends up eating a lot of frozen foods, forgoing health for convenience.

Not that I can blame her. Sometimes I have trouble making toast in the morning, let alone a meal that incorporates every possible food group (wine counts, right?). So when I offered to go spend a week with her and cook her some healthy meals, I naively assumed that she would actually LET me do the cooking. I ate so much processed cheese that now I’m even avoiding oranges. Let’s hope it’s a temporary aversion.

The one thing I did manage to make for her was a tourtière. Originally, I used this recipe from the Food Network, but I’ve tweaked it to meet my personal preferences. I generally like heavily spiced foods and I found the Food Network recipe to be too mild for my tastes.

Pastry

Ingredients:

  • 2 1/2 cups flour
  • 1 tbsp sugar
  • 1 tsp salt
  • 1 cup cold butter, chopped into bits
  • 1/2–1 cup cold water

Combine dry ingredients and add chopped butter. Mix butter into dry mixture until it resembles coarse meal. Large chunks of butter are ok (and even encouraged!). Add water 1 tbsp at a time until mixture holds together in a ball. Cut in half and refrigerate. Makes enough for 1 double-crust pie.

Filling

Ingredients:

  • 1–1 1/2 cup mashed potatoes, sans butter
  • 2 onions, diced
  • 4 cloves garlic, minced
  • 2 lbs extra lean ground beef, pork, or combination
  • 1 cup frozen peas
  • 1/2 cup chopped mushrooms
  • 3/4 tsp salt
  • 1/4 tsp ground pepper
  • 1 tsp ground allspice
  • 1 tsp ground cloves
  • 2 bay leaves
  • 1 cup apple cider or beef stock*
  • 1/2 cup water, if needed
  • 1 egg for glazing (optional)

Preheat oven to 375 degrees F.

Cook potatoes until well done. Mash roughly and set aside.

Heat a large skillet on medium-high heat. Add enough butter to grease the bottom and sauté onions and garlic until translucent and fragrant. Add ground meat and cook until no pink remains.

Once the meat has cooked, add the peas, the mushrooms, and all the spices at once. Stir until well combined and let cook for 1-2 minutes. Add the cider or beef stock and water (if needed) and the bay leaves and let sit until most of the liquid has evaporated. Add the mashed potatoes to soak up the remaining liquid and set aside to cool.

While mixture is cooling, roll out pastry dough. Fill a 9-inch pie pan or springform pan with the filling and top with pastry and brush with egg. Make sure to cut steam holes in the top.

Bake at 375 degrees F for 40-60 minutes or until pastry is a golden brown. Let cool at least 10 minutes before serving.

*One time, I was out of beef stock and apple cider, so I decided to use rum. It was delicious, but lacked in salt. If you use a low-sodium liquid, make sure to up the salt quotient.

Georgian Bay Apple Pie

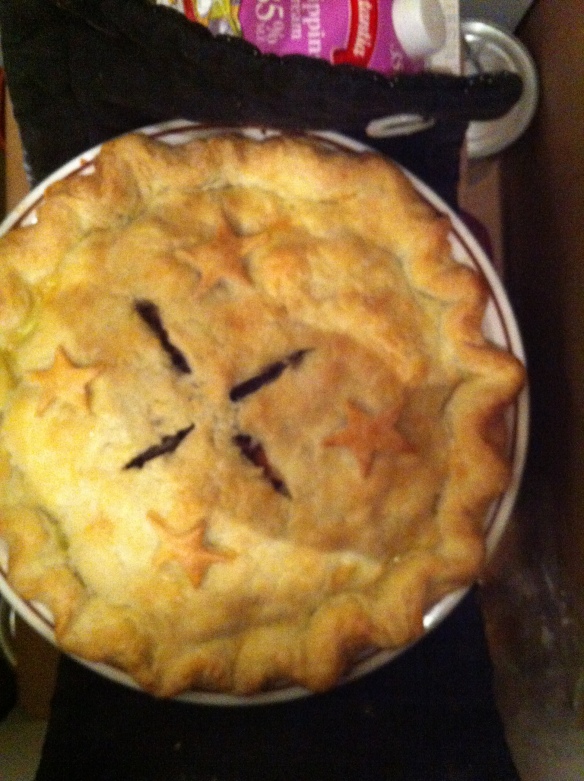
IMG_0247

Mmm, apple pie.

Who doesn’t love the smell of tart apples, cinnamon, and pastry fusing together to form a delicious, crispy slice of heaven.

I remember apple pie being a rare treat growing up. My mum would make it for Thanksgiving and Christmas and very occasionally on request. My very favourite part was the crust—perfectly crisp and flaky and buttery to the last bite. Once I had been taught how to make the perfect pastry (the recipe can be found here at Smitten Kitchen), my mum gave me her coveted recipe. It was like I had been entrusted to my family’s entire wealth, which I will now share with you.

This pie is too good to keep closeted away.

Ingredients

Pastry for deep 9-inch double-crust pie

For brushing:

  • 1 tbsp light cream
  • 1 tsp granulated sugar

Filling:

  • 8 cups sliced, peeled apples
  • 3/4 cup granulated sugar
  • 3 tbsp all-purpose flour
  • 2 tsp coarsely grated orange rind (approx. 1 orange)
  • 1/4 tsp nutmeg
  • 1/2 tsp cinnamon
  • juice of 1 orange
  • 1 1/2 tsp butter

Preheat oven to 425 degrees F (220 degrees C).

In a large bowl, toss apples, sugar, flour, rind, nutmeg, cinnamon, and orange juice. Spoon into a prepared pie shell and dot with butter.

Roll out top pastry. Moisten the rim of the shell and cover with top pastry. Trim edges and fold under to make a thick crust and flute it with your fingers. Brush lightly with cream and sprinkle with sugar.

Cut steam vents in the top of the crust and be sure to put a pan under the pie while it’s in the oven. Otherwise you will have sticky sugary goo on the bottom of your oven that will tend to aggravate your fire alarm.

Bake at 425 degrees F for 20 minutes. Then, reduce heat to 375 F (190 C) and bake for 35-40 minutes. The pie is done when the crust is golden brown and a knife stuck in the steam vent meets minimal resistance. Let pie cool on a rack and top with whipped cream or cheddar cheese.

2013-09-16 21.29.02

In Search of Edible Bread

When I moved in with my boyfriend, I realized two things.

One: we both loved good food. Two: we were poor. We could easily spend $150 a week on quality meats and cheeses and bread. There is a little Italian bakery two blocks from our apartment that specializes in cannoli and large, round, earthy boules of fresh-baked bread; needless to say, I was hooked.

After a few months of overspending on food that we enjoyed, but sometimes forgot about, my boyfriend and I started to budget everything out. Our goal was to eat for less than $80 a week, which meant eating meat once a week, and not having four different types of goat cheese in the fridge. But I like bread. And so does my boyfriend. There was no way I was going to start eating Wonderbread from the grocery aisle; I like crunchy crusts and large crumbs. But artisan bread is hard to fit into a tight budget.

Thus began my search for edible bread. At first, we would buy the biggest loaf from the bakery and try to make it stretch for the whole week. Sometimes it worked, and sometimes it didn’t. Occasionally, the bread would start to grow mould and my gluten-loving heart would break.

One day, I spied a book in my cupboard. It was Ken Forkish’s Flour, Water, Salt, Yeast that I had bought a month before moving. I had only glanced at it cursorily, but was willing to give it a try. After all, I had made oatflake bread with my grandmother—how hard could it be?

My first loaf was a disaster. I’d halved Forkish’s recipe for a Saturday white loaf. (I’m very glad I didn’t do the whole recipe. That would have been a kilo of flour wasted!) But my apartment is cold in the winter (with all the drafts coming from the window with a HOLE in it…) and the bread barely rose. The crust was delicious, but it felt like I was chewing playdough.

2013-11-28 00.01.24

The second attempt was a little better. I placed the bowl next to the radiator and the extra heat gave the loaf a little more volume. But the dough hadn’t quite tripled in size. Normally, I am quite good at baking, so I took the second loaf as a sign that bread was not going to be my forte. I cut into it, defeated, ego destroyed by this dense lump of chewiness.

I’ve always been a sore loser, though. The first chapter of Flour, Water, Salt, Yeast is a background into what my boyfriend calls “bread theory.” Because I didn’t know why I had ruined the first two loaves, I wasn’t able to fix them. But Forkish fixed that for me. I learned the relationship between water temperature and yeast growth (hint: the colder the ambient temperature, the warmer your water should be). I also learned that water over 114 degrees Farenheit kills the yeast.

With the first two loaves, I had merely guessed the temperature of the water. I boiled the kettle until it was about 70 or 80 degrees Celsius (far, FAR hotter than it should have been) and killed my yeast. No wonder my bread didn’t rise! The second time, I ran the tap until the water was lukewarm—way too cold for this time of year, and in Canada, to boot. The best investment I made for this project was my little thermometer. It tells me when my water is the right temperature.

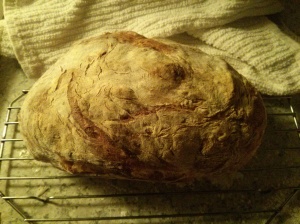
My third loaf of bread was perfect. It tasted exactly like the bread from the Italian bakery down the street. It was warm, crisp, and soft all at once. The best part about making your own bread is that it dramatically reduces the costs. Since I work from home, I can start the bread in the morning, give it a few folds while I work, and let it rise through the afternoon. Depending on the price of flour, a quality loaf of bread can cost anywhere from 40 cents to a dollar per loaf.

I found my edible bread right in my own kitchen. If my editing career takes a turn for the worse, I may just have to open my own bakery.

2013-12-30 19.44.31